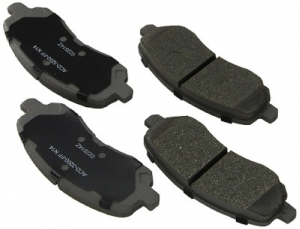
The nice part about a do-it-yourself brake jobs is there’s no slick service writer to up sell you things that you don’t need. Unfortunately, even if you have an auto repair manual for your car, there is no one there to make sure you don’t take shortcuts or do a poor job. When you take the time to do it right, you avoid problems like brake noise, a pulling condition when braking and premature wear of the replacement pads. Let’s explore the different levels of a do-it-yourself brake job so you can decide what’s right for you and your car.
The Slap and Go Brake Job

When you drive by a retail automotive center you might see an interesting sign out front offering free brake inspections or a complete brake job for a tasty low price. The idea for the shop is to get you in and get the wheels off of your car. At that point they will provide you with a list of reasons why you shouldn’t go for that bargain basement brake job service. The interesting thing is, I agree with them.
However, I don’t agree with the method they used to lure you in. Note how I used the word lure. This device tricks a fish into thinking they found something good. Then you get hooked and pulled inside the boat. So what is a pad slap service? In a nutshell, a slap and go brake job is when you pull the wheels and replace the brake pads only. This operation is performed by driveway mechanics and professional ones alike.
When you see an auto repair center advertising a brake job under $75 this is most likely the type of service you’ll receive for that price. Think about it, on many cars, removing the wheels, backing out the two caliper bolts and inserting new brake pads only takes 20 minutes. If you have a car hoist and air tools you could probably cut this time in half. Now let’s move on to the bare minimum service that I will perform in any situation.
The Standard Disc Brake Job

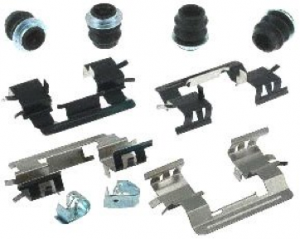
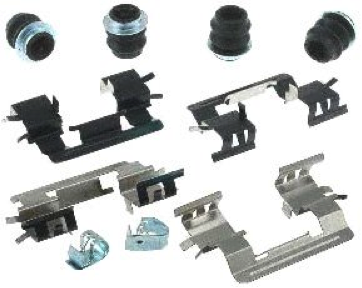
Basically a standard disc brake job will include replacement of the pads and the hardware. Depending on the automobile, a replacement hardware kit will include different items. With that said, almost every application will include brake pad retention clips and anti-rattle hardware. They make the retention clips out of stainless steel and allow the brake pads to slide up and back when drivers apply and release the pedal.
The anti-rattle hardware stops the brake pad from vibrating which is the leading cause of brake noise. In addition, some brake pad kits will come with brake shims that fit between the pad and the caliper piston. Shims absorb vibration between the metal surfaces of the inner brake pad and the face of the caliper piston. The brake shim is an important component used to prevent brake squeal.
If you purchase a set of brake pads that includes the hardware, it might also include new caliper slides on some models. Also on these gold level kits you’ll find a one serving size of caliper lube. They designed this specialized product to hold up against extreme heat. This lubricant becomes waterproof and should last as long as the brake pads. We apply it to the caliper slides to facilitate the up and back movement of the caliper when it applies and releases. It’s important for both sides to move freely or a brake pull could result.
A Standard Brake Job with New Rotors
About 20 years ago brake rotors were thick and heavy pieces of equipment. Back then when we performed a standard brake job we called it a hang and turn. We would replace the brake pads and chuck the rotors in a brake lathe to recondition the surface of the rotor.
These rotors use to be so thick that you could do 3 to 5 brake jobs before you had to replace the rotor. This meant that many cars went to the graveyard with their original equipment rotors. On modern automobiles the chances of it making it to the junkyard with its factory installed rotors are almost zero.
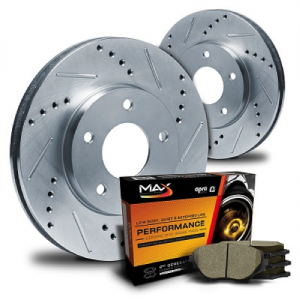
Manufacturers found it necessary to reduce vehicle weight in every place possible to meet stricter fuel economy standards. They started making the rotors thin and out of a composite material to reduce the weight of the automobile. Many of these rotors are so thin that they cannot be resurfaced more than once. In fact, if the rotor is heavily warped you might not even get one resurfacing out of it.

This means that if your car needs a standard brake job it might also need a set of rotors. The main symptoms of warped rotors are a brake pulsation. This is when you feel a surging feedback in the brake pedal or in the smoothness in the way the automobile comes to a stop. When the rotors are extremely warped the brake pads ride over the high spots and push the caliper piston inward. Hydraulic fluid forces its way back into the master cylinder and then against your foot. This is why you’ll feel the pedal moving up and down while braking.
If the rotors become only slightly warped you might not feel a pulsation in the brake pedal itself. Instead you’ll feel a light surging as the vehicle comes to a stop. This is most evident when the vehicle is at speeds at 30 mph and decreasing slowly. The time to replace the brake rotors, when you have a pulsation condition, is when performing a standard brake job. If you ignore the signs and just replace the disc brake pads, the pulsation will continue to get worse. In addition to the poor stopping quality you will also get less life out of the replacement brake pads.
DIY Brake Jobs Final Thoughts
The nice part about working on old cars at home is we get to take the time to do the job right. Why not apply the money we save on labor towards buying the best brake pad kit available? Sometimes we refer to these as gold level or even platinum level replacement brake pad kits. Since these include stainless steel hardware and maybe even caliper slides, this becomes money well spent. Even if you decide to go for these top-tier kits you still save big money over what you would have paid a retail auto repair center to do a lesser service.
Check out my blog post for more brake job tips.

